
Sourdough Bagels
High Altitude/Dry Climate
This is important as dough rises quicker at higher altitudes. You can absolutely adjust the rise time and instructions provided to make these at a lower elevation.
Prep time 20 to 30 min
Rest Time 6 to 12 hours
Cook time 15 to 25 min
Servings 6, but you can make 8 smaller bagels
One of the biggest shifts one can make when it comes to anything sourdough, let the recipe be a guide, but don't ignore your five senses! Once you learn to let your senses guide you, you will fall in love with baking.
I have found that taking time to really pay attention the first and second time I bake bread, bagels and tortillas-shifts everything! Taking notes of how long it takes my dough to feel smooth, combined,and bouncy-is key.
So often you'll hear that you need to knead the dough for 6 to 10 minutes until smooth, guess what, if I knead for 6-10 minutes, my dough is going to be overworked, but I have friends that knead for 10 minutes and it is perfect. I knead for 4 minutes max and this is plenty. Why is it different for everyone?
The flour, water, butter (no butter in this recipe, but you get what I mean)....The ingredients you use changes how much it needs to be worked.
Your strength or the tools you use to work your dough is also different.
This is why it is so important to take note of what your process is and how your dough feels.
Since I am grinding wheat berries, rye and...I find that my dough needs a lot less time. 3 minutes max is usually all my dough needs to come together, smoothly.
With that said, here is my ready to bake first thing in the AM sourdough bagel recipe that has worked great for us.
In the morning around 8 am, I feed my starter. I know this means my starter will be bubbly and ready to use around 8pm. 12 hours to rise might be too long or not enough time depending on your climate, so make sure to know how long it takes your starter to double in size. In the summer my starter is ready in 4 hours, so I shift my feeding times. On another note-You can actually make these bagels the same day, if you have a starter that is super active and fast to double in size.
To make a ½ CUP (100 g) of starter which is what you'll need for this recipe, follow below. I do everything in grams and strongly suggest using a kitchen scale for all baking, until you are comfortable with the measurements. Now I just use the same jar and know where to fill everything to.
15 g sourdough starter
50 g all-purpose flour or the flour you bake sourdough with
50 g water
Mix these together and wait for the magic to happen.
When your starter is good and bubbly, you'll mix the dough as shared below. I usually mix mine around 8 pm. It's quick.
BAGEL DOUGH
100 g active sourdough starter
255 g water
40 g honey
10 g sea salt
500 g flour
I warm my water slightly and find that filtered water works best. Tip-If you have chlorinated water, let a bucket of water sit out overnight to release the chlorine.
Put warm water in a large bowl and add honey and salt. Stir until the honey and salt have melted/dissolved. Then add your flour. Mix preferably with your hands until the dough comes together. It will be firm, but soft.
Cover with anything that will retain moisture, I use a beeswax wrap and a cloth over that. Since we keep our home around 65 to 67 degrees I leave my dough on the counter overnight to rest and rise. In the winter my dough is ready 12 hours later.
How do I know my dough is ready?
It will be puffy, maybe not double in size, but puffy. It will also spring back when you touch it. The dough will not ve sticky and comes our of the bowl fairly clean.
Tip- I never follow a time, I check my dough first thing when I wake and it usually needs a little more time as I am up at 5 AM. Around 8 AM my dough is ready to divide and shape.
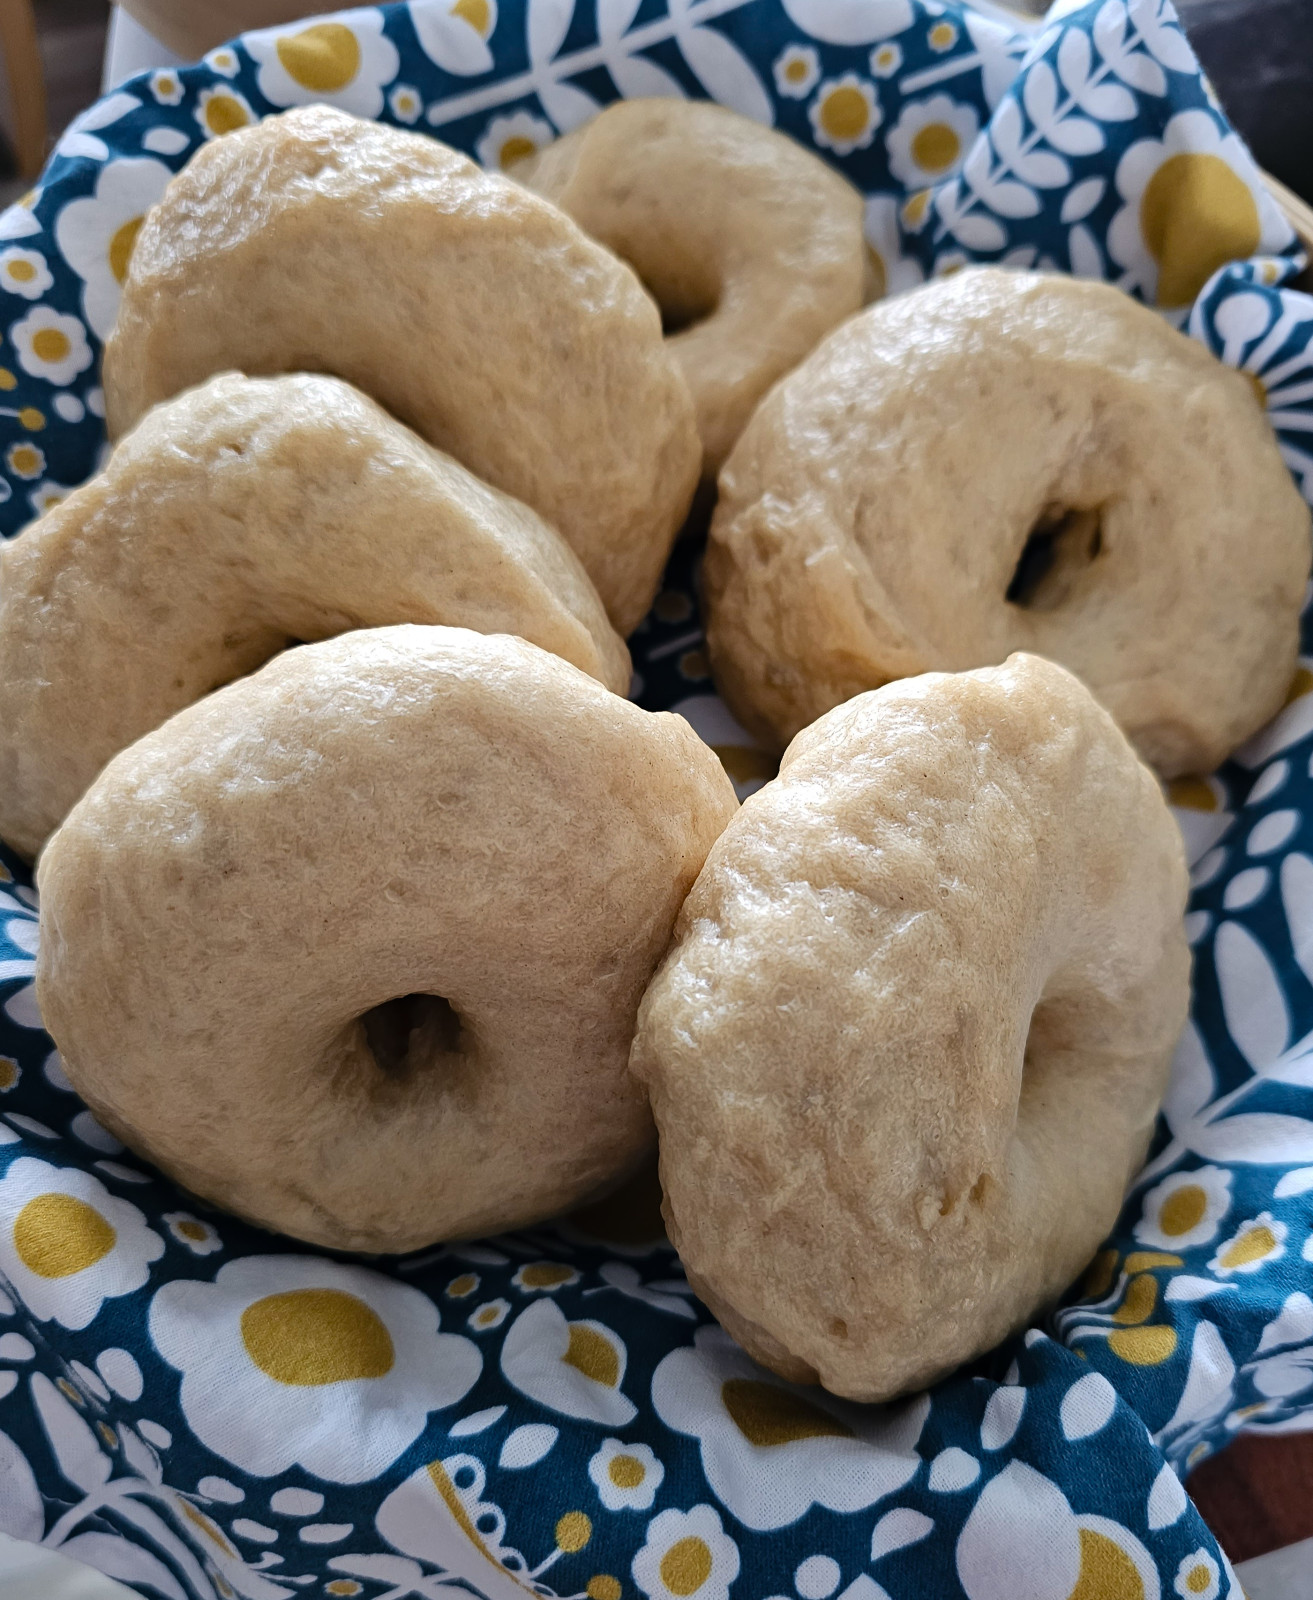
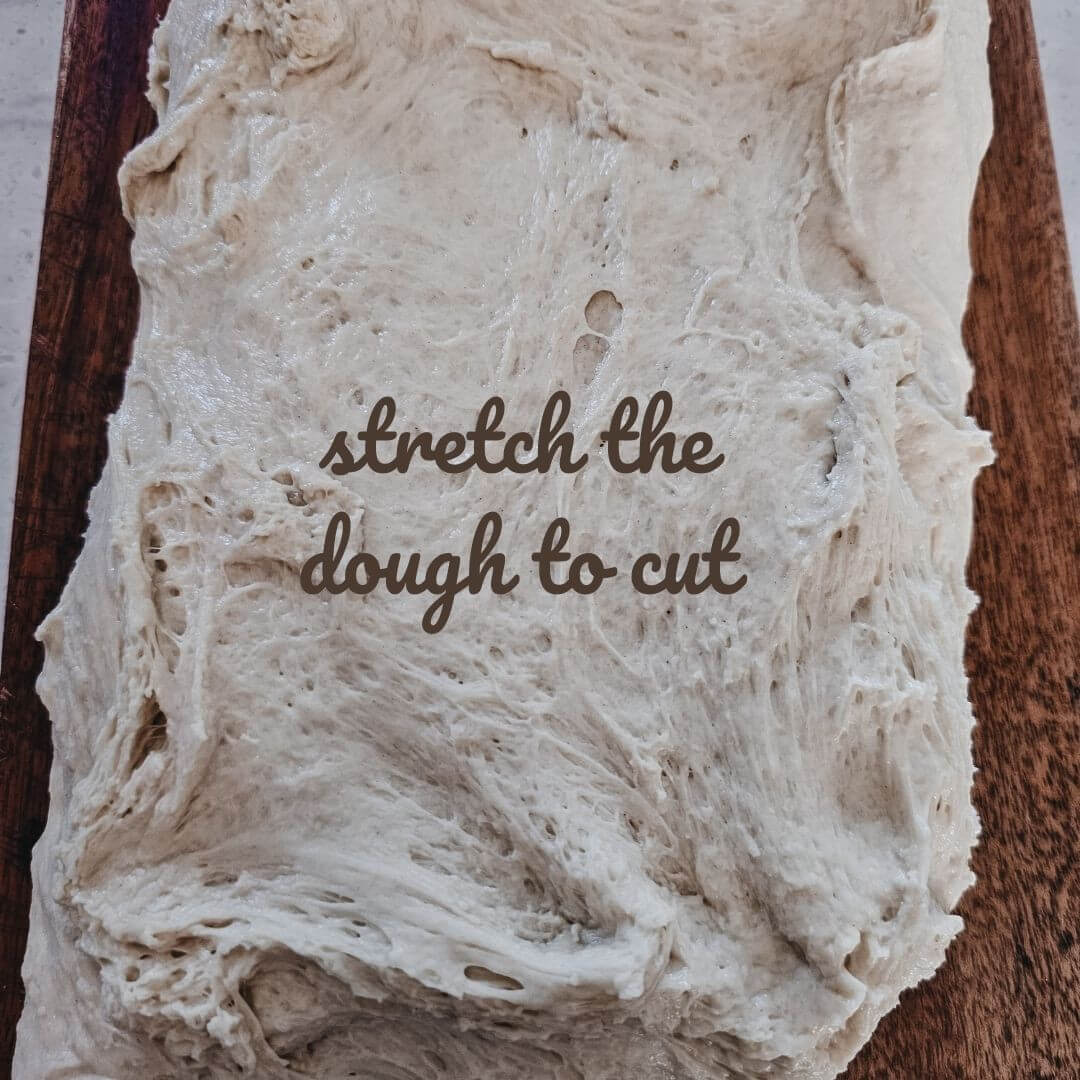
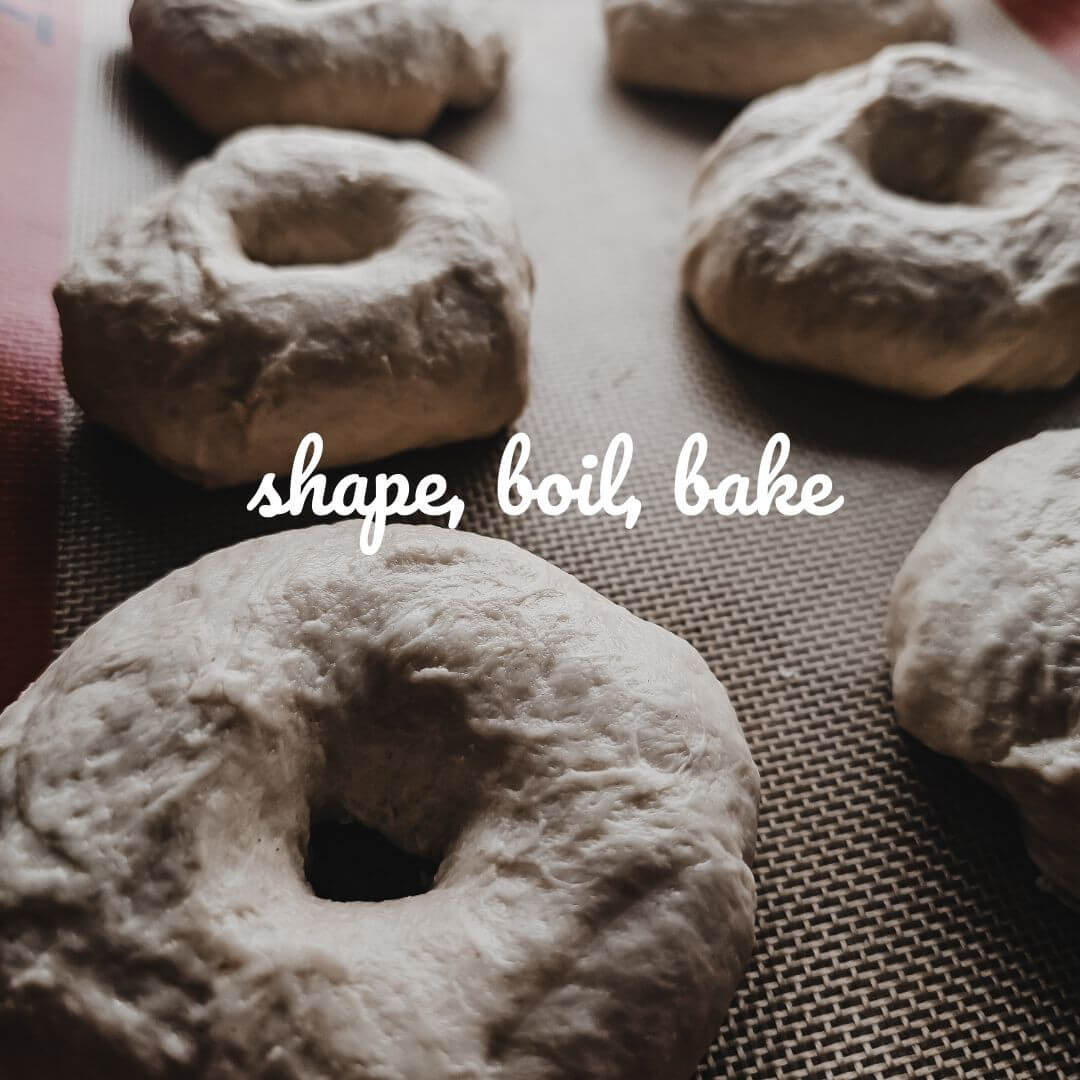
To shape-I lay my dough flat on my silpat and cut into 6 evenish pieces. I gently fold under the sides to make a bagel shape then push my thumb through the center. You can roll into a ball, but I find this takes the air out of the dough, but it does make a smoother/prettier bagel.
After a year of making these I realized my bagels do not need a second rest period after they have been shaped. Instead I arrange the shaped bagels evenly on parchment or a silpat lined baking sheet, cover them with a tea towel and get my water boiling right away-I use about 4 inches of water to boil. I don't add anything to the water.
This is also when I preheat my oven to 425°F. If you're at a lower altitude, decrease your temp by 15 to 20 degrees.
Boil the bagels, a few at a time, for 2 minutes on each side and place them back onto the parchment or silpat.
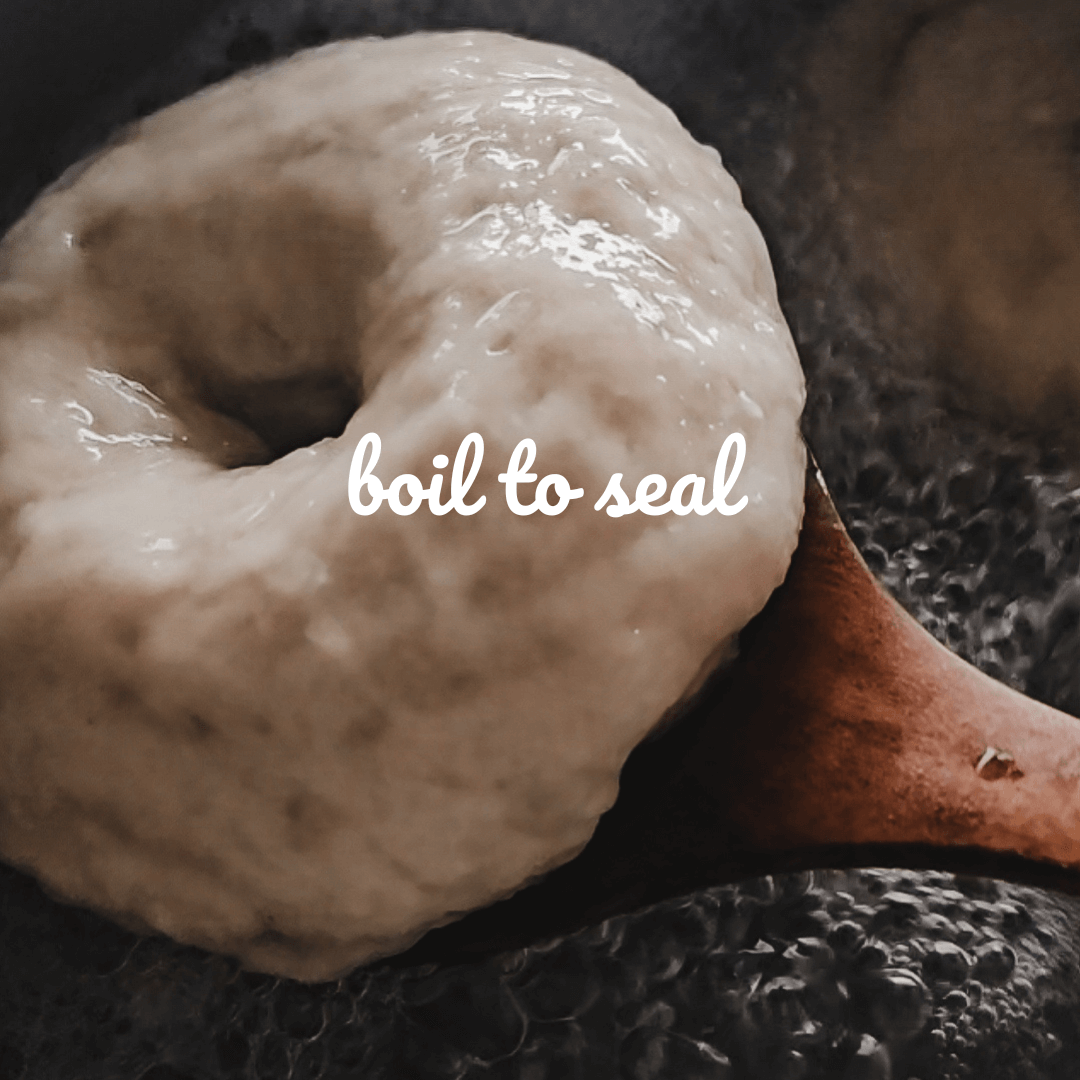
Note-If bagels fall to bottom of pot when boiling, let them sit for a min then gently nudged with a wooden spoon and they should float to the top.
Toppings? After boiling, let bagels cool a bit, then dip in melted butter and the topping of your choice. Our favorites- everything bagel seasoning, cinnamon/coconut sugar. We also love fresh garlic slices! These are also wonderful without a topping and you can also add a topping after they have baked.
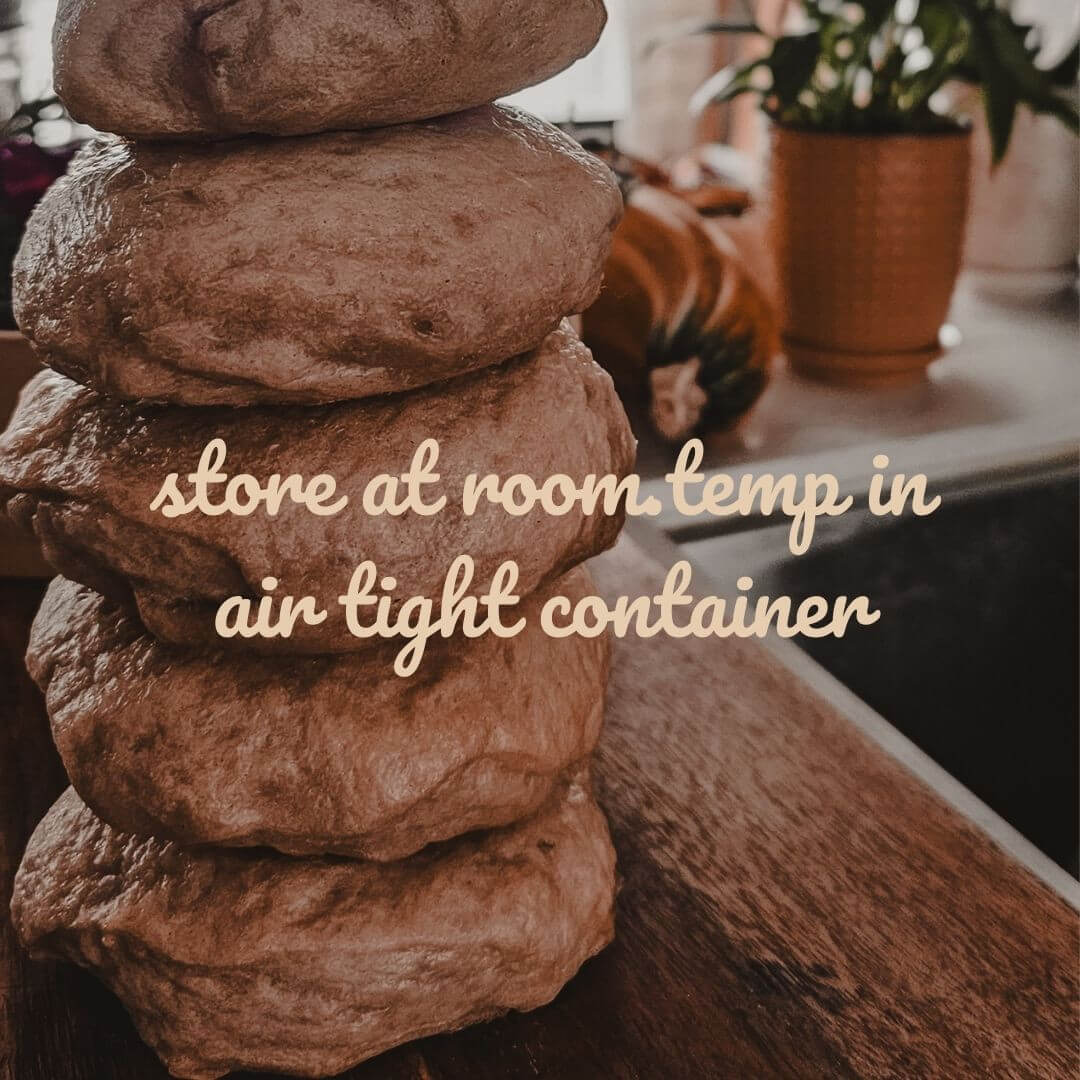
After all the bagels are boiled, place them in the oven to bake for 15 to 25 minutes. 20 minutes is what works here. You're looking for golden brown tops and bottoms. You may need to adjust your temp or rack position if the bottom of your bagels get dark, too fast.
Let the bagels cool and store at room temperature covered with a tea towel. I would avoid placing it in the fridge.
These do freeze well. After cooling, place in a freezer bag and pop into the freezer.
I hope you enjoy these!
I would love to see what you come up with.
Tag me on IG @destinationmommy


0 Comments